
Any professional or do-it-yourselfer serious about making a beautiful, long-lasting floor needs to know how to stagger vinyl plank flooring? This method does double duty by improving the flooring’s aesthetics and strengthening its structure. If you know how to stagger the planks correctly, you can keep your floor looking great for a long time without worrying about unsightly seams or structural weaknesses.
Who Needs to Know About Staggering Vinyl Plank Flooring?
Anyone from amateurs starting a do-it-yourself flooring installation project to seasoned pros seeking to improve their skills will find useful information in this guide. Staggering vinyl plank flooring correctly is essential for getting the greatest results whether you are renovating an existing room, building from the ground up, or doing a home renovation. This skill is highly beneficial for individuals in search of a durable, aesthetically pleasing flooring option that can withstand the wear and tear of daily use.
Planning Your Vinyl Plank Flooring Layout
Understand Your Space
Make sure you know the room’s dimensions and any quirks before you start laying vinyl plank flooring. To avoid wasteful cuts and perfectly aligned planks throughout the room, take precise measurements and carefully plan the layout.
Choose the Right Direction
The layout of your vinyl planks has a significant impact on the overall look of the room. Take into account the room’s dimensions, the direction of natural light, and any prominent features, such as fireplaces or doorways. A helpful trick for smaller rooms is to arrange planks parallel to the longest wall to create the illusion of a larger space.
Determine the Stagger Pattern
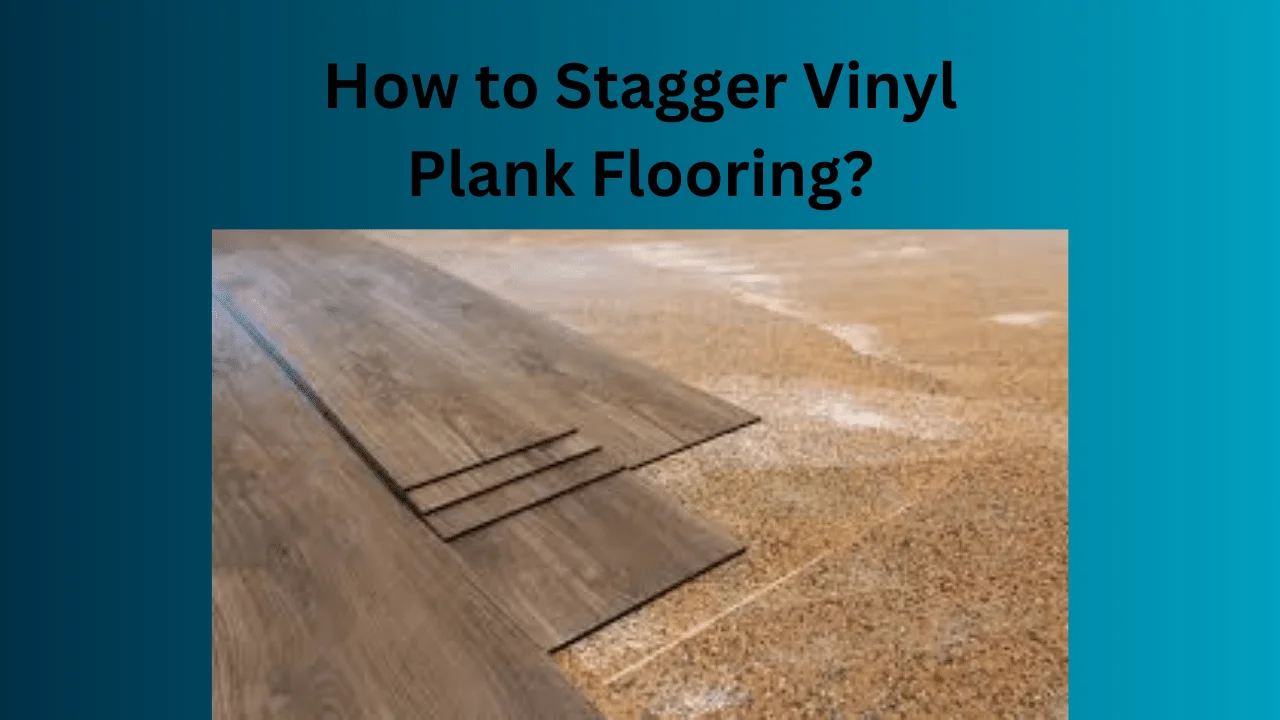
It is critical to decide on the stagger pattern in advance. Staggering vinyl plank flooring from 6 to 12 inches is the most common. To avoid seam alignment, which can affect the installation’s appearance and integrity, make sure that the end joints of the planks in consecutive rows are at least 6 inches apart.
Consider the Plank Width
The stagger pattern can be affected by the width of your planks as well. To get a more rustic appearance with wider planks, you might have to use a bigger offset. Also, make sure the stagger satisfies your aesthetic needs by thinking about its visual impact.
Plan for Obstacles
Special attention is required whenever you enter a room because of potential obstructions like columns, vents, or corners. Keep the stagger pattern flowing as much as possible and minimize cuts made for these obstacles in your layout planning.
Cutting Techniques for Staggered Vinyl Plank Installation
Measure Twice, Cut Once
Vinyl flooring installation requires precise measurements. Before cutting, make sure you have the exact dimensions. In addition to reducing material waste, this method guarantees a gap-free fit between the planks.
Use the Right Tools
Clean cuts can be made in vinyl planks using a vinyl cutter or a sharp utility knife. For optimal results, make sure your tools are designed for the specific type of vinyl plank you are installing.
Cutting for Aesthetic Appeal
Think about the final design of the boards before you cut them to begin new rows. For a uniform and balanced appearance throughout the floor, try to use cut pieces that are the same size or slightly smaller than the full planks.
Preserve Structural Integrity
Cuts should not be too small, as the floor’s stability can be compromised by small pieces. As a general guideline, you shouldn’t use pieces that are shorter than 6 inches for the ends of the rows.
Handling Complex Cuts
If your room is not perfectly square, you might have to make some tricky cuts. To ensure a tight fit around corners and obstacles, use cardboard templates to trace and cut complicated shapes precisely.
Ensuring Long-Lasting Adherence
Preparing the Subfloor
Subfloor preparation is crucial to the durability of vinyl plank flooring. Before you start installing the subfloor, make sure it is clean, dry, and level. Uneven surfaces can lead to planks dislodging or wearing unevenly over time, and any dirt or debris can hinder proper adhesion.
Selecting the Appropriate Adhesive
You can extend the life of your flooring in high-traffic or damp areas by using the correct adhesive. There are vinyl planks that have adhesive already applied, but if you need a stronger bond, you can always use more glue.
Applying the Adhesive Correctly
When applying adhesive, be sure to follow the manufacturer’s instructions. Before installing the planks, the adhesive is typically spread evenly across the subfloor using a trowel. To avoid shifting or peeling after installation, make sure there are no gaps or bubbles.
Testing Adhesion Before Full Installation
It is recommended to test a small number of planks to see how well they stick to the subfloor before placing the remaining planks. Doing so can save time and avoid problems with the installation as a whole in the future.
Achieving a Seamless Finish
Matching Patterns and Colors
Be sure that the pattern and color consistency of the vinyl plank flooring are consistent across all of the boxes before you begin staggering. To keep the flooring looking consistent, mix planks from different boxes so there aren’t any obvious color differences.
Checking Plank Alignment
As you install the planks, make sure to check their alignment frequently. When floorboards aren’t properly aligned, it can cause gaps and uneven spacing that look bad. To keep the distances between the planks consistent, use spacers if needed.
Sealing the Edges
Particularly in wet environments like bathrooms and kitchens, sealing the installation’s perimeter can prevent dirt and water from seeping under the vinyl planks. With the right sealant, you can add another layer of protection, extending the time that your floor looks brand new.
Final Inspection
Check the floor thoroughly once the installation is finished. Check for any problems or areas that require adjusting to make sure everything is snug and secure.
How to Keep Your Staggered Vinyl Plank Floors in Top Condition
Regular Cleaning
Regularly mopping your vinyl plank flooring with a damp mop and a gentle cleaner will keep it looking great. Be careful not to use any chemicals that are too harsh on the vinyl.
Immediate Spill Cleanup
Avoid possible slipping or staining hazards by promptly responding to spills. Even though vinyl is water-resistant, the subfloor or adhesive could get damaged from standing water for too long.
Avoiding Scratches and Dents
Put furniture pads under the legs of tables and chairs to protect them from scratches and dents. Put runners or area rugs in heavily walked areas to protect your new flooring.
Periodic Detailed Cleaning
Maintain a regular schedule of thorough floor cleanings. To keep the floor’s sheen and finish in pristine condition, use a cleaner designed specifically for vinyl floors to eliminate dirt and grime that accumulates over time.
FAQs
Q1: How often should vinyl plank floors be cleaned?
Regular cleaning is recommended at least once a week with a damp mop and a mild cleaner.
Q2: Can I use a steam mop on vinyl plank flooring?
It is generally not recommended to use a steam mop as the heat can damage the adhesive and vinyl material.
Q3: What is the minimum stagger distance for vinyl planks?
The minimum stagger distance should be at least 6 inches between the ends of the planks in adjacent rows.
Q4: How do I replace a damaged vinyl plank?
To replace a damaged plank, carefully remove the affected piece and replace it with a new one, ensuring it fits securely and matches the existing floor pattern.
Q5: Is underlayment necessary for vinyl plank flooring?
While not always mandatory, using an underlayment can provide additional noise reduction, moisture protection, and comfort underfoot.
Conclusion
How to Stagger Vinyl Plank Flooring? to look good and last a long time, you need to learn these cutting and planning techniques. Anyone interested in enhancing their home with staggered vinyl plank flooring will find this foundation to be a useful guide.

Shannon Reyes is a seasoned writer with a knack for crafting engaging blogs on a variety of service industries, including plumbing, cleansing, moving, pest control, and roofing. With a keen eye for detail and a passion for helping readers navigate complex topics, Shannon brings her expertise to life through informative and accessible content.


I don’t think the title of your article matches the content lol. Just kidding, mainly because I had some doubts after reading the article.